Description:
Step by Step guide to make a Canvas App using the Power Apps.
Works with Microsoft Office365.
Solution:
Create an App
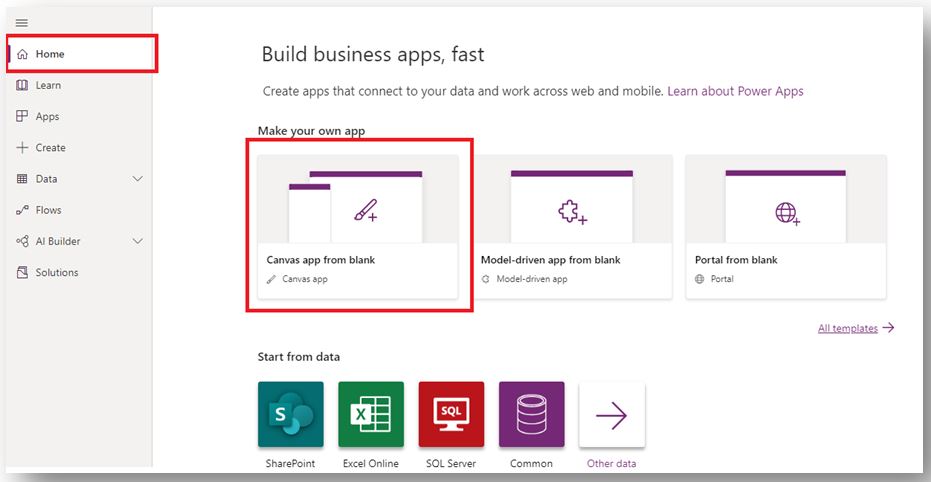
Access your Power Apps account by signing in.
- From the main screen, choose the option “Start with an app template” to proceed. If you wish to explore a specific template, click on it to learn more. In case you want to select a different template, click “Cancel” and then choose another one.
Select one of the following alternatives:
- If you intend to create a three-screen mobile app utilizing data stored in Dataverse, opt for “From Dataverse.”
- If your goal is to create a three-screen mobile app that connects to an external data source, choose from the available options such as:
- “From SharePoint”
- “From Excel”
- “From SQL”
- If your goal is to create a three-screen mobile app that connects to an external data source, choose from the available options such as:
- If you prefer to use alternative templates, browse through the list of other app templates and select the one that suits your needs.
- Once you have chosen a template, you can customize the app’s name and select the desired layout for your app.
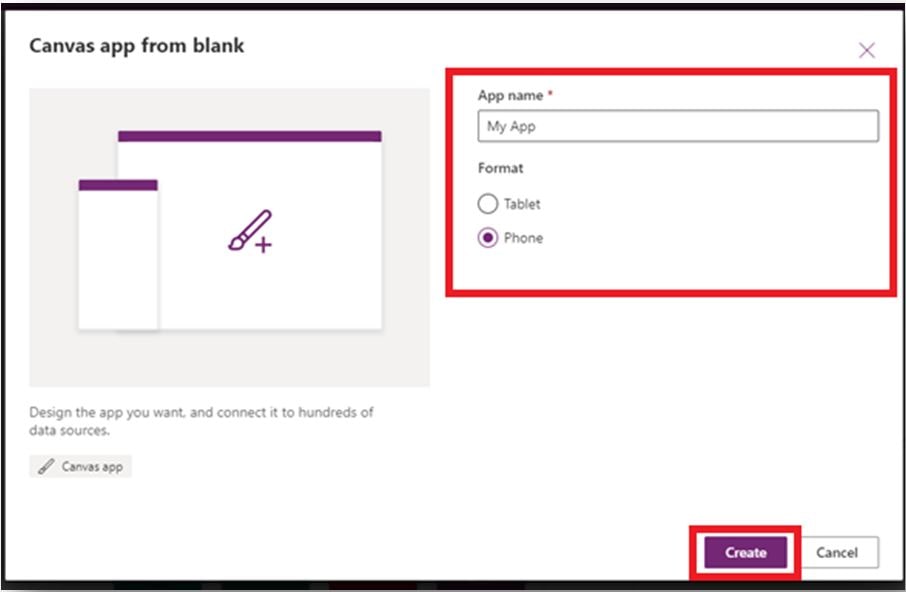
3. When you have completed the necessary modifications, click “Next” to proceed.
Run the app
An app from a template opens in Power Apps Studio, where you’ll spend most of your time customizing. Before you make any changes to the app, explore how the app works in Preview mode.
Press F5 to open the app in preview mode. Alternatively, you can also select the play button on the top-right corner of the screen to preview the app.

The app is populated with sample data to demonstrate the functionality of the app.
Explore the app’s default behavior by creating, updating, and deleting sample data, and then verify that the data in your cloud-storage account reflects your changes.
Return to the default workspace by pressing Esc (or by selecting X icon near the upper-right corner).
Next steps
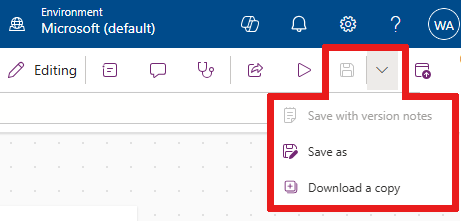
Press Ctrl-S, give your app a name, and then select Save to save your app to the cloud.
or
Select the down arrow, placed on upper right corner as given in the picture and save your app in the cloud.
Share your app with other people in your organization.
Additional Information:
Before you share an app, make sure that the people with whom you’re sharing it have access to the data. For example, you must share an Excel or other file in a cloud-storage account.